Main loop
You reached the last step of this guide. Finally the application will render something on your screen and even be somewhat interactive. So what needs to be done? You will just need two things.
- Create a main loop for your application to render each frame as long as your window has not been closed.
- Update the camera manager each frame with the relativ time difference between your current frame and the previous one.
Sounds like a lot of code, right? Well, not really.
// here should be the intial setup code

// creates a main loop and calls the provided lambda expression each frame
core.run([&](const vkcv::WindowHandle &windowHandle, // the active window handle
             double t,                // the time since the main loop started
             double dt,               // the delta time between latest frames
             uint32_t swapchainWidth, // the width of your swapchain image
             uint32_t swapchainHeight // the height of your swapchain image
) {
  cameraManager.update(dt); // updating the camera manager each frame

  // here should be your rendering code for each frame
});
The method run(...) from the Core object will internally create a loop which manages time calculations, checking whether your application's windows are still open and polling for input events. So you don't have to worry about any of that. You can also get rid of the while loop from the generated code of the part about application development. That can be replaced by this.
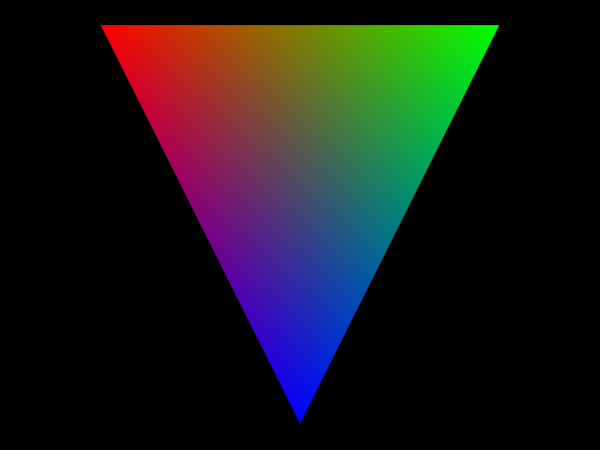
With all of the code from the guide combined, you should now get a window on your screen which draws a single triangle. But if there's still an issue, you can compare with a complete code piece here for the "main.cpp" file.
#include <vkcv/Core.hpp>
#include <vkcv/Pass.hpp>
#include <vkcv/shader/GLSLCompiler.hpp>
#include <vkcv/camera/CameraManager.hpp>

#include <glm/glm.hpp>

int main(int argc, const char** argv) {
  const std::string applicationName = "My application";

  vkcv::Core core = vkcv::Core::create(
    applicationName,
    VK_MAKE_VERSION(0, 0, 1),
    { vk::QueueFlagBits::eGraphics },
    { VK_KHR_SWAPCHAIN_EXTENSION_NAME }
  );

  const int windowWidth = 800;
  const int windowHeight = 600;
  const bool isWindowResizable = false;

  vkcv::WindowHandle windowHandle = core.createWindow(
    applicationName,
    windowWidth,
    windowHeight,
    isWindowResizable
  );

  vkcv::Window& window = core.getWindow(windowHandle);

  vkcv::PassHandle renderPass = vkcv::passSwapchain(
    core,
    window.getSwapchain(),
    { vk::Format::eUndefined }
  );

  vkcv::ShaderProgram shaderProgram;
  vkcv::shader::GLSLCompiler compiler;

  compiler.compileProgram(
    shaderProgram,
    {
      { vkcv::ShaderStage::VERTEX, "shaders/shader.vert" },
      { vkcv::ShaderStage::FRAGMENT, "shaders/shader.frag" }
    },
    nullptr
  );

  vkcv::GraphicsPipelineHandle gfxPipeline = core.createGraphicsPipeline(
    vkcv::GraphicsPipelineConfig(
      shaderProgram,
      renderPass,
      {},
      {}
    )
  );

  vkcv::VertexData vertexData;
  vertexData.setCount(3);

  vkcv::InstanceDrawcall drawcall (vertexData);
  const auto swapchainInput = vkcv::ImageHandle::createSwapchainImageHandle();

  vkcv::camera::CameraManager cameraManager (window);

  auto camHandle = cameraManager.addCamera(vkcv::camera::ControllerType::PILOT);
  cameraManager.getCamera(camHandle).setPosition(glm::vec3(0, 0, 2));

  core.run([&](const vkcv::WindowHandle &windowHandle,
               double t,
               double dt,
               uint32_t swapchainWidth,
               uint32_t swapchainHeight
  ) {
    cameraManager.update(dt);

    glm::mat4 mvp = cameraManager.getActiveCamera().getMVP();

    auto cmdStream = core.createCommandStream(vkcv::QueueType::Graphics);

    core.recordDrawcallsToCmdStream(
      cmdStream,
      gfxPipeline,
      vkcv::pushConstants<glm::mat4>(mvp),
      { drawcall },
      { swapchainInput },
      windowHandle
    );

    core.prepareSwapchainImageForPresent(cmdStream);
    core.submitCommandStream(cmdStream);
  });
}
This is it. Less than 100 lines of code and you have rendered a triangle with Vulkan. This is actually comparable to other examples in OpenGL for example. So I hope it gets clear that Vulkan doesn't have to mean writing more code if using the proper tools.

