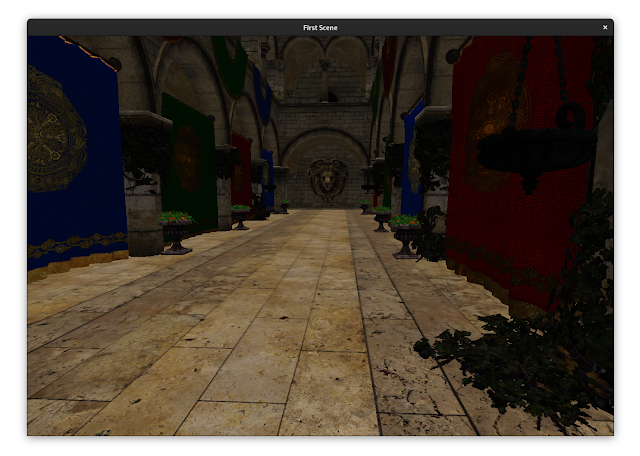
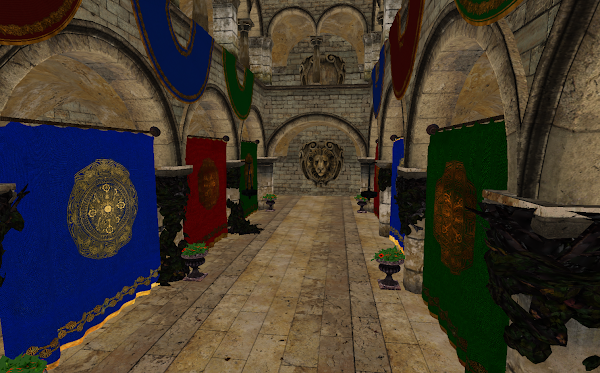
Posts

Showing posts from September, 2022

Scene rendering

Image
Now with the shaders compiled, vertex layout configured and descriptor set layouts specified, the rendering can begin. In a similar way as with the single triangle, you need to record draw calls. But this time a draw call per mesh will be recorded. Each draw call will automatically use the descriptor set of the individual material from the given mesh. But push constants as well as additional descriptor sets need to be configured in a callback if used (in the example here only the push constants get filled with individual data): auto recordMesh = [](const glm::mat4& mvp, // mvp matrix of mesh const glm::mat4& model, // model matrix of mesh vkcv::PushConstants& pushConstants, // push constants vkcv::Drawcall& drawcall // draw call ) { // append contents of the push constants for each draw call pushConstants.appendDrawcall(mvp); }; // record draw calls for the whole

Materials

Technically materials are defined in a separate module from the VkCV but because the scene module will take advantage of that, you won't need to look into huge details. The only thing important to you is that a material provides a descriptor set and a descriptor set layout. You can think of a descriptor set as a bundle of different resources (like images, buffers or samplers) on your GPU but in a more abstract way. Each descriptor set does not contain the actual data but when you use it, your GPU knows exactly where to look for the data of its resources. Each draw call with your graphics pipeline can use different descriptor sets as long as they match the same descriptor set layout. All the layouts of descriptor sets, you want to use sets with in your shaders, need to be passed as arguments during graphics pipeline configuration. Fortunately the scene module loads all materials with the same descriptor set layout. So that means you can take the layout from any of the

Vertex layout

As stated before you need to setup a vertex layout for the meshes in your loaded scene. The reason for this is that a vertex shader usually receives vertex attributes as input data per vertex during rendering. Those values can then be used for calculation or get forwarded via interpolation to later shader stages. Here is a vertex shader to manage the loaded geometry of the scene: shaders/shader.vert #version 450 layout(location = 0) in vec3 inPosition; // vertex position layout(location = 1) in vec3 inNormal; // vertex normal layout(location = 2) in vec2 inUV; // vertex uv-coordinate layout(location = 0) out vec3 passNormal; // normal to interpolate layout(location = 1) out vec2 passUV; // uv-coordinate to interpolate layout( push_constant ) uniform constants { mat4 mvp; // model-view-projection matrix }; void main() { // transform the vertex position from model-space into projection-space gl_Position = mvp * vec4(inPosition, 1.0); // pass the normal a

Scene loading

Loading a complex scene like the iconic Sponza scene can be done via the scene module from the VkCV framework. For this you only need to provide the path of your scene of choice as GLTF file. In this example the file is placed relative to the projects directory inside an "assets" subfolder. Because you want to load data from host (the CPU) memory into GPU memory, you likely need transfer queues. In case of the scene module this is definitely required. So don't forget to add the fitting vk::QueueFlagBits::eTransfer flag to your core instance creation. Notice that GLTF files do not necessarily contain all data of its scene but link to this data (in form of binary files for the meshes and images for the used textures) via relative paths. So make sure that all required files can be found at the location you want to load the scene from. #include <vkcv/scene/Scene.hpp> vkcv::scene::Scene scene = vkcv::scene::Scene::load( core, // core instance // Rel

Depth buffer

When you want to render a whole scene or at least more complex geometry, there can certainly be cases of occlusion. Therefore you will either need to manually sort your geometry manually before rendering or you take advantage of a depth buffer storing the distance between your geometry and the position of the camera. In Vulkan that means you will need to create a depth buffer in the size of your rendering resolution and attach it to the graphics pipeline as target. In the following example code the depth buffer is created dynamically in the main loop to adjust in case the resolution changes. This is necessary if you want to use windows which allow resizing during runtime (not just for a depth buffer but also for other images depending on the current render resolution). vkcv::ImageHandle depthBuffer; // uninitialized depth buffer core.run([&](const vkcv::WindowHandle &windowHandle, double t, double dt, uint32_t swapchainWidth, uint32_t swapchainHeight) {

How to render a scene

Image
Now that you know how to draw a single triangle , it might interest you how to render more complex geometry or even a scene containing multiple meshes with materials. The following guide will show you how to render a full scene using a depth buffer for occlusion and using multiple textures combined as PBR materials. The guide uses multiple modules of the VkCV framework for this task. Therefore it will only take a few additional steps compared to the previous guide: Step 1 - Scene loading Step 2 - Depth buffer Step 3 - Vertex layout Step 4 - Materials Step 5 - Scene rendering You can also find the whole list of steps in the overview page of this blog and this here is our goal of the following guide - rendering the iconic Sponza scene without any advanced lighting effects though. Previous Next

Main loop

Image
You reached the last step of this guide. Finally the application will render something on your screen and even be somewhat interactive. So what needs to be done? You will just need two things. Create a main loop for your application to render each frame as long as your window has not been closed. Update the camera manager each frame with the relativ time difference between your current frame and the previous one. Sounds like a lot of code, right? Well, not really. // here should be the intial setup code // creates a main loop and calls the provided lambda expression each frame core.run([&](const vkcv::WindowHandle &windowHandle, // the active window handle double t, // the time since the main loop started double dt, // the delta time between latest frames uint32_t swapchainWidth, // the width of your swapchain image uint32_t swapchainHeight // the height of your swapchain image ) {

Camera management

Managing cameras (even multiple) with the VkCV framework is quite easy. You can create a camera manager instance for your window, add a new camera with its individual controller type. Then you get all benefits of adjusting the camera during runtime with input as well as switching between multiple cameras. The individual cameras will be identified via their handle related to their manager. So don't use these handles with different managers and such. It's probably best to use only one camera manager per application anyway. Just notice that cameras, camera controllers and their manager are not part of the core VkCV framework but another module. So you need to add the ${vkcv_camera_include} as include directory and vkcv_camera as library for linkage in the "CMakeLists.txt" file of your project. #include <vkcv/camera/CameraManager.hpp> vkcv::camera::CameraManager cameraManager (window); // add a new camera to the application with a pilot controller au

Draw calls and command streams

Draw calls In the VkCV framework there are different kinds of draw calls. But in this case you want to use an InstanceDrawcall. This specific kind will only need a VertexData object an the amount of instances (which defaults to 1 because you won't need instancing fow now). vkcv::VertexData vertexData; // a new vertex data object // setting the vertex count to 3 (remember the vertex shader?) vertexData.setCount(3); // a new instance drawcall to draw the specified data once vkcv::InstanceDrawcall drawcall (vertexData); That's it. You don't need anything more because the vertex shader will already take care of positions and vertex colors for your triangle. Command streams Command streams are another abstraction of the VkCV framework. In Vulkan you would use command buffers which are managed via pre-allocated command pools for your device's queues. Here all this resource management gets out of your way and you can simply create a command stream selecting th

Graphics pipeline

Shaders You are very close to the creation of the graphics pipeline to draw the triangle. But a pipeline needs defined stages which means in Vulkan you have to write shaders. In this example you will need only two shaders: A vertex shader to pass your geometry to further rasterization stages and a fragment shader to pass specified values to each attached render target. Vertex shader This here will be your vertex shader, written in GLSL for Vulkan (you will find more detailed information about the language in other sources but it is very similar to GLSL for OpenGL if that is any help). shaders/shader.vert #version 450 // vertex color to be interpolated for each fragment layout(location = 0) out vec3 fragColor; // push constants of the pipeline layout( push_constant ) uniform constants { mat4 mvp; // model-view-projection matrix }; void main() { // positions of each vertex for the triangle in model-space vec3 positions[3] = { vec3(-0.5, 0.5, 1), // upper left

Render pass

Concept It's time to start with the actual rendering. For this you will need a graphics pipeline which will utilize shaders and define what you can render with it. However before you can setup your graphics pipeline, a render pass needs to be created. But what is this render pass, you ask? A render pass is a resource from Vulkan which will be abstracted by the VkCV framework as simple Pass handle. In Vulkan the render pass consists of different subpasses which define what the targets for our rendering are in form of attachments. Also you can define dependencies, binding points and other details but that's not important now. The VkCV framework simplifies those render passes massively but in most cases this won't matter at all. Implementation A Pass handle from the framework can be created by only defining the attachments via their individual formats in most cases. Including the header for the pass creation functions is necessary though. #include <vkcv/Pass.

Window creation

Creating the window So now that the Core is created and the required extensions and features are selected, the application can start becoming visual. Because the goal is to draw a triangle and that will need some kind of surface to present the triangle on. Therefore a window needs to be created: const int windowWidth = 800; const int windowHeight = 600; const bool isWindowResizable = false; // for our goal resizing is not necessary vkcv::WindowHandle windowHandle = core.createWindow( applicationName, // reuse the application name as title of the window windowWidth, // initial width of the window windowHeight, // intiial height of the window isWindowResizable // whether the window can be resized by the user ); So that's it. The window is created and can be used. However you might have noticed that the code states it has created a window handle. What's a handle? Handles In the VkCV framework most resources will be provided and used as handles. Yo

Feature management

Extensions As mentioned in the previous step about Core creation , you need to specify the Vulkan extensions and features which are required by the application or potentially useful for optimization but optional. For now we only focus on requirements though. In case our application only requires some specific extensions. You can provide a list of those extension identifiers to the function creating the Core instance. The extension identifiers are just string constants in that case. For example: { VK_KHR_SWAPCHAIN_EXTENSION_NAME, // "VK_KHR_swapchain" VK_KHR_SHADER_FLOAT16_INT8_EXTENSION_NAME, // "VK_KHR_shader_float16_int8" VK_EXT_DESCRIPTOR_INDEXING_EXTENSION_NAME // "VK_EXT_descriptor_indexing" } Those string constants come directly from the Vulkan headers as macros. But you can also use the exact literals of course. Features However in most cases you don't just enable required extensions in Vulkan. You also need

Core creation

The Core is the main object in the VkCV framework to manage and utilize resources of the application. Each application creates such a Core instance initially providing the application's name, its version, the required types of queues, Vulkan extensions and features. Make sure to include the header defining the Core class though. #include <vkcv/Core.hpp> const std::string applicationName = "My application"; vkcv::Core core = vkcv::Core::create( applicationName, // application name: "My application" VK_MAKE_VERSION(0, 0, 1), // application version: 0.0.1 { vk::QueueFlagBits::eTransfer, // queue flag required to transfer data to the GPU vk::QueueFlagBits::eGraphics, // queue flag required to make draw calls vk::QueueFlagBits::eCompute // queue flag required to make compute calls }, { VK_KHR_SWAPCHAIN_EXTENSION_NAME // extension required to draw into a window } ); In this code example initializer lists are used

How to draw a triangle

Image
As a fresh start with the VkCV framework this blog will show you how to draw your first triangle. This guide will not just show the most important pieces to start developing with the framework but also provide you a good example to compare with bare Vulkan or OpenGL implementations. The guide to draw a single triangle will be devided into the following steps: Step 1 - Core creation Step 2 - Feature management Step 3 - Window creation Step 4 - Render pass Step 5 - Graphics pipeline Step 6 - Draw calls and command streams Step 7 - Camera management Step 8 - Main loop You can also find the whole list of steps in the overview page of this blog and this here is our goal of the following guide - a single triangle with different colors for each vertex. Previous Next

Application development

Environment The main purpose of the VkCV framework is to ease application development. But how would you start once your IDE is all setup? First of all, here is the general directory structure of the framework and what the specific folders contain: config/ - CMake configuration and custom functions for the build process doc/ - All sorts of documentation include/ - The headers of the VkCV framework API lib/ - The dependencies of the framework as submodules modules/ - All current modules provided by the framework itself projects - The example application using the framework and its modules resources/ - The list with the recommended extensions for example scripts/ - Useful shell/bash scripts to interact with the command line src/ - The source code of the framework Generation As you might have noticed the subdirectory called "projects" contains all example applications and it is easiest to create a new application in there integrated

Use Vim

Installation Vim can probably be installed directly via your package management. Otherwise you will find releases of Vim on its website here . Just follow the instructions depending on your operating system and configure it however you prefer. There are multiple different guides how to setup Vim for C++ development online. Feel free to look for yourself (extensions for C++ auto-completion might be useful though). Development Most development will be straight forward. Writing code is just like writing text. So just open the files you want to edit with Vim and do as you wish. Execution Building and running your projects via Vim can be done by using CMake, make and other commands directly from the command line of the editor itself. However to make things a little more convenient, notice that there are some scripts for you provided by the VkCV framework under scripts : build.sh will run cmake using a preferred profile and build a selected target of choice. run.sh w

Use CLion

Installation You can install CLion from JetBrains official website here . Just notice that CLion is commercial software which is neither free nor open-source. So it might better to look for a different option. Otherwise there's few to say about its installation or configuration since it comes with quite useful tools built-in. The only thing to keep in mind is that you might still need to install VisualStudio on Windows to get the MSVC compiler. Development When you startup CLion, select the local directory of the cloned framework and open it as project. Once the project has been loaded, you can run CMake via the "Reload CMake Project" option in the context menu (right mouse-click in the project file browser). This will create all build and launch targets. Execution If you want to build or launch a specific project, select it via the dropdown to the left of launch button with the green play-symbol. You can find it in the top right tool bar. In any case CLio

Use VSCodium

Image
Configuration If you have installed VSCodium the first time, there are some things to know. It's an IDE for all different kinds of programming languages and it makes use of extensions to support all of that. So one thing you can do is install some useful extensions to develop with the framework. The list of of extensions can be installed using a script under scripts/setup-codium.sh in the repository. Just navigate into the directory of the framework before. cd vkcv-framework ./scripts/setup-codium.sh On Windows you can also run the following command via PowerShell opened in the directory of the framework to install the extensions from the list in the text file under resources/extensions.txt : Get-Content resources\extensions.txt | ForEach-Object {codium --install-extension $_} These extensions include support for the CMake build process, C++ code completion, GitLab integration and proper debugging tools. So you will have everything you need without searching and goin

First setup

Cloning the repository One of the first things you will need is Git with the large file storage extension installed. So on most Linux distributions you can get git and git-lfs from your distributions repository. On Windows you should get Git with a basic shell from here and the newest release of git-lfs from here . When both is installed you will need to run the following command in the shell (for example Git Bash on Windows) once: git lfs install Then you can clone the official repository with all required submodules from the shell as following: git clone --recurse-submodules https://gitlab.uni-koblenz.de/vulkan2021/vkcv-framework.git Building the framework Now you should have all required dependencies to build the framework from source except the Vulkan headers. Those headers can be installed via the VulkanSDK . On Linux distributions you should also get those headers from the distributions repository though. To build the framework from source you will need

Introduction

About This blog will teach you about the basic usage of the VkCV framework . The VkCV is a framework designed and built by students from the University Koblenz for computer graphics. Technically the framework is built with Vulkan and allows to utilize the Vulkan API on top of the framework in case you need certain features. However, the tutorials on this blog focus on the core API of the framework itself by going through different examples of increasing complexity. So you will learn how to develop with that instead. The tutorials do not require any prior knowledge of Direct3D , OpenGL , Metal or Vulkan . But the basics of 3D computer graphics won't be covered in detail. So it will help to get this knowledge from other sources. Also in some cases the VkCV framework utilizes certain concepts of the Vulkan API to reduce the cost of abstraction. In those cases the tutorials will explain those concepts out of necessity. Just don't expect a full detailed guide about Vulkan.