Posts

Scene rendering

Image
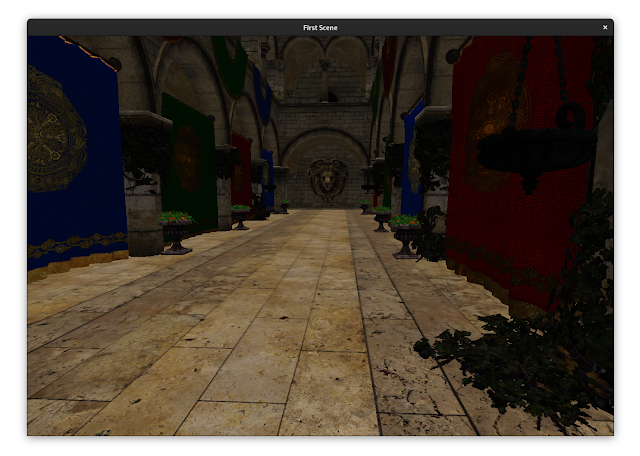
Now with the shaders compiled, vertex layout configured and descriptor set layouts specified, the rendering can begin. In a similar way as with the single triangle, you need to record draw calls. But this time a draw call per mesh will be recorded. Each draw call will automatically use the descriptor set of the individual material from the given mesh. But push constants as well as additional descriptor sets need to be configured in a callback if used (in the example here only the push constants get filled with individual data): auto recordMesh = [](const glm::mat4& mvp, // mvp matrix of mesh const glm::mat4& model, // model matrix of mesh vkcv::PushConstants& pushConstants, // push constants vkcv::Drawcall& drawcall // draw call ) { // append contents of the push constants for each draw call pushConstants.appendDrawcall(mvp); }; // record draw calls for the whole...
Materials

Technically materials are defined in a separate module from the VkCV but because the scene module will take advantage of that, you won't need to look into huge details. The only thing important to you is that a material provides a descriptor set and a descriptor set layout. You can think of a descriptor set as a bundle of different resources (like images, buffers or samplers) on your GPU but in a more abstract way. Each descriptor set does not contain the actual data but when you use it, your GPU knows exactly where to look for the data of its resources. Each draw call with your graphics pipeline can use different descriptor sets as long as they match the same descriptor set layout. All the layouts of descriptor sets, you want to use sets with in your shaders, need to be passed as arguments during graphics pipeline configuration. Fortunately the scene module loads all materials with the same descriptor set layout. So that means you can take the layout from any of the...

Vertex layout

As stated before you need to setup a vertex layout for the meshes in your loaded scene. The reason for this is that a vertex shader usually receives vertex attributes as input data per vertex during rendering. Those values can then be used for calculation or get forwarded via interpolation to later shader stages. Here is a vertex shader to manage the loaded geometry of the scene: shaders/shader.vert #version 450 layout(location = 0) in vec3 inPosition; // vertex position layout(location = 1) in vec3 inNormal; // vertex normal layout(location = 2) in vec2 inUV; // vertex uv-coordinate layout(location = 0) out vec3 passNormal; // normal to interpolate layout(location = 1) out vec2 passUV; // uv-coordinate to interpolate layout( push_constant ) uniform constants { mat4 mvp; // model-view-projection matrix }; void main() { // transform the vertex position from model-space into projection-space gl_Position = mvp * vec4(inPosition, 1.0); // pass the normal a...

Scene loading

Loading a complex scene like the iconic Sponza scene can be done via the scene module from the VkCV framework. For this you only need to provide the path of your scene of choice as GLTF file. In this example the file is placed relative to the projects directory inside an "assets" subfolder. Because you want to load data from host (the CPU) memory into GPU memory, you likely need transfer queues. In case of the scene module this is definitely required. So don't forget to add the fitting vk::QueueFlagBits::eTransfer flag to your core instance creation. Notice that GLTF files do not necessarily contain all data of its scene but link to this data (in form of binary files for the meshes and images for the used textures) via relative paths. So make sure that all required files can be found at the location you want to load the scene from. #include <vkcv/scene/Scene.hpp> vkcv::scene::Scene scene = vkcv::scene::Scene::load( core, // core instance // Rel...

Depth buffer

When you want to render a whole scene or at least more complex geometry, there can certainly be cases of occlusion. Therefore you will either need to manually sort your geometry manually before rendering or you take advantage of a depth buffer storing the distance between your geometry and the position of the camera. In Vulkan that means you will need to create a depth buffer in the size of your rendering resolution and attach it to the graphics pipeline as target. In the following example code the depth buffer is created dynamically in the main loop to adjust in case the resolution changes. This is necessary if you want to use windows which allow resizing during runtime (not just for a depth buffer but also for other images depending on the current render resolution). vkcv::ImageHandle depthBuffer; // uninitialized depth buffer core.run([&](const vkcv::WindowHandle &windowHandle, double t, double dt, uint32_t swapchainWidth, uint32_t swapchainHeight) { ...

How to render a scene

Image
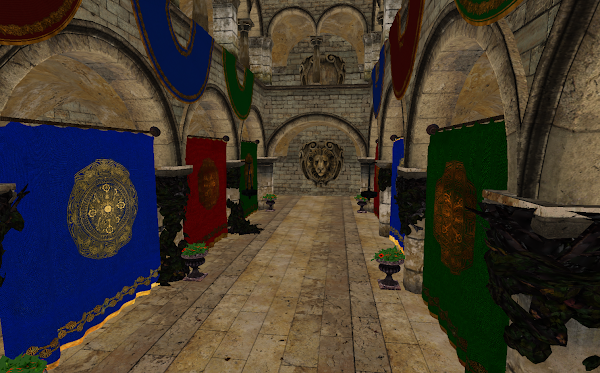
Now that you know how to draw a single triangle , it might interest you how to render more complex geometry or even a scene containing multiple meshes with materials. The following guide will show you how to render a full scene using a depth buffer for occlusion and using multiple textures combined as PBR materials. The guide uses multiple modules of the VkCV framework for this task. Therefore it will only take a few additional steps compared to the previous guide: Step 1 - Scene loading Step 2 - Depth buffer Step 3 - Vertex layout Step 4 - Materials Step 5 - Scene rendering You can also find the whole list of steps in the overview page of this blog and this here is our goal of the following guide - rendering the iconic Sponza scene without any advanced lighting effects though. Previous Next

Main loop

Image
You reached the last step of this guide. Finally the application will render something on your screen and even be somewhat interactive. So what needs to be done? You will just need two things. Create a main loop for your application to render each frame as long as your window has not been closed. Update the camera manager each frame with the relativ time difference between your current frame and the previous one. Sounds like a lot of code, right? Well, not really. // here should be the intial setup code // creates a main loop and calls the provided lambda expression each frame core.run([&](const vkcv::WindowHandle &windowHandle, // the active window handle double t, // the time since the main loop started double dt, // the delta time between latest frames uint32_t swapchainWidth, // the width of your swapchain image uint32_t swapchainHeight // the height of your swapchain image ) {...